
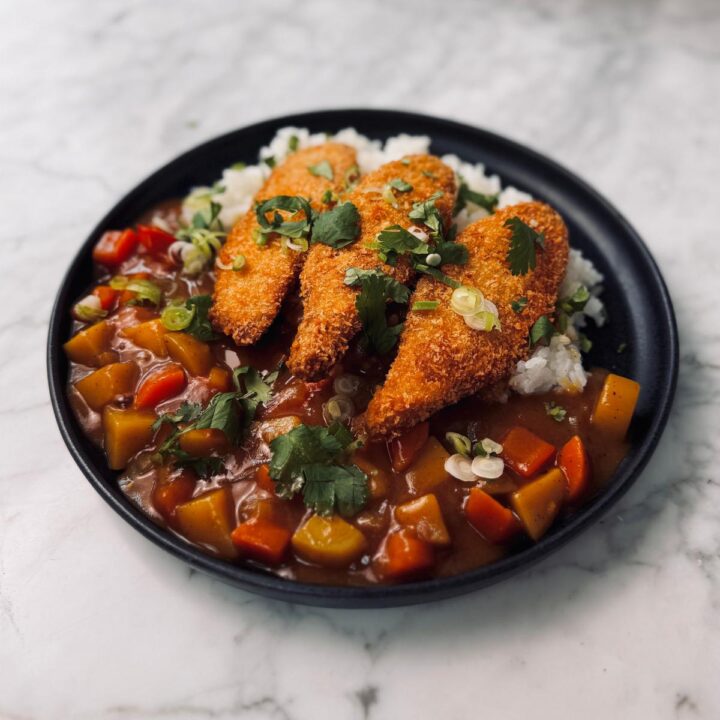
Sweet Potato Katsu Curry is our vegan take on the classic Japanese katsu curry. Crispy, panko-coated sweet potato cutlets are served with a rich, aromatic curry sauce made from S&B Golden Curry roux and a bowl of fluffy steamed rice. This vegan Japanese katsu curry is comforting, easy to make at home, and full of plant-based flavor everyone will love.
Sweet Potato Katsu Curry – At a Glance
Ask AI about this recipe
Summaries, substitutions, scaling, allergen checks — or save this site to your AI for future recipe ideas.
AI answers can be wrong. Treat them as suggestions, not as a substitute for the recipe above.
Why We Love It
- Sweet potato katsu has a soft, naturally sweet, creamy centre with a crisp panko crust.
- S&B Golden Curry roux gives an authentic Japanese flavor in minutes.
- Make the curry and katsu ahead of time, then reheat and serve with steamed rice for an easy weeknight dinner.
Jump to:
Ingredients
Serves 4 | Prep time 15 mins | Cooking time 45 mins
S&B Golden Curry is the gold standard for making a classic Japanese curry sauce with the traditional vegetable base of onion, carrot, potato and red bell pepper. The sweet potatoes are roasted first for a soft, creamy centre, then coated in panko breadcrumbs for a light, crispy katsu finish. Read on for an ingredient overview and a step-by-step walkthrough with extra tips before you start cooking, or scroll to the printable recipe card for full quantities.
- Japanese curry roux (S&B Golden Curry)
- Onion
- Carrot
- Potato
- Red bell pepper
- Neutral oil
- Water
- Sweet potatoes
- Panko breadcrumbs
- Plain flour
- Oat milk
- Japanese rice
- Green onions (spring onions)
- Cilantro (coriander)
How to Make Sweet Potato Katsu Curry
There are four main parts to making this vegan Japanese katsu curry:
- Roast the sweet potatoes until tender inside.
- Cook the curry sauce using S&B Golden Curry and classic Japanese vegetables.
- Coat and fry the katsu until light and crispy.
- Assemble and serve with rice and garnish toppings.
Let's go through each step in detail.
1. Roast the Sweet Potatoes
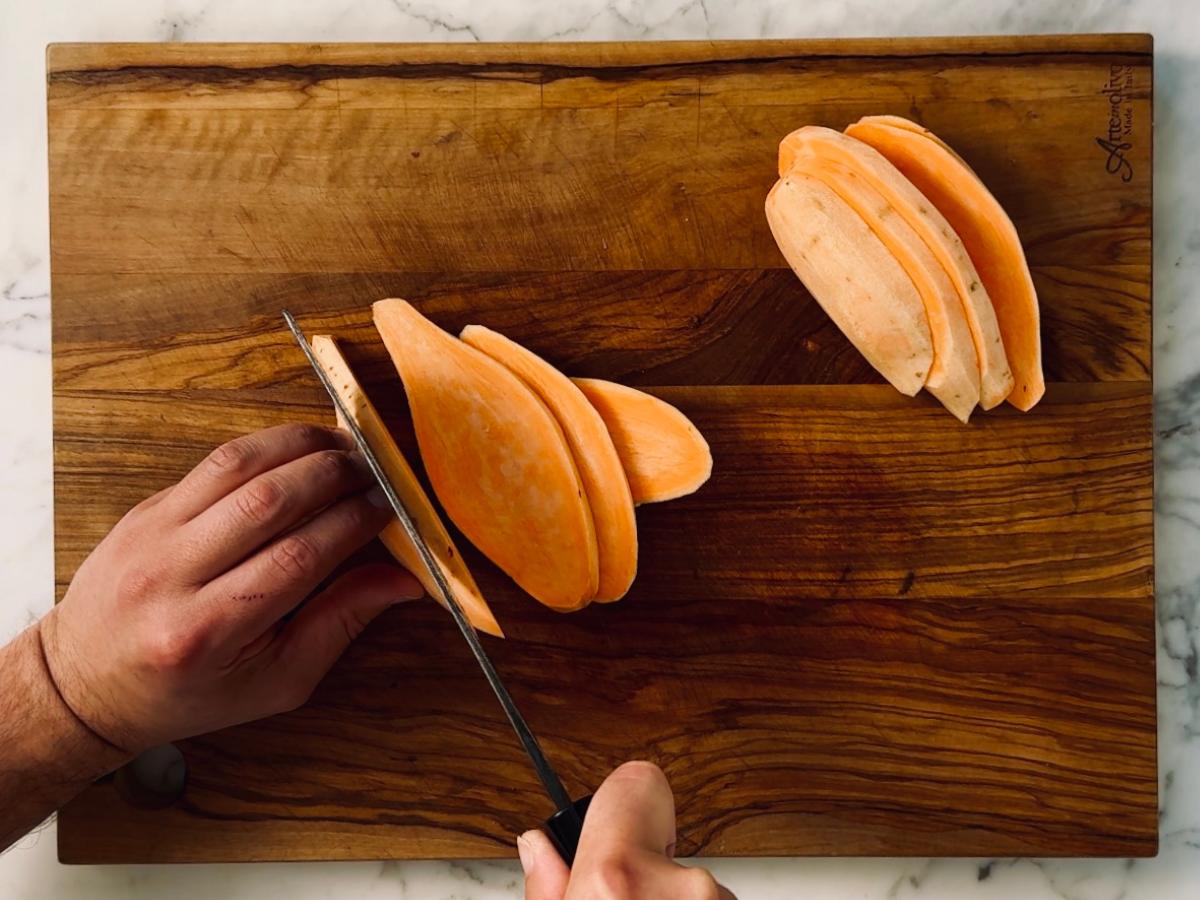
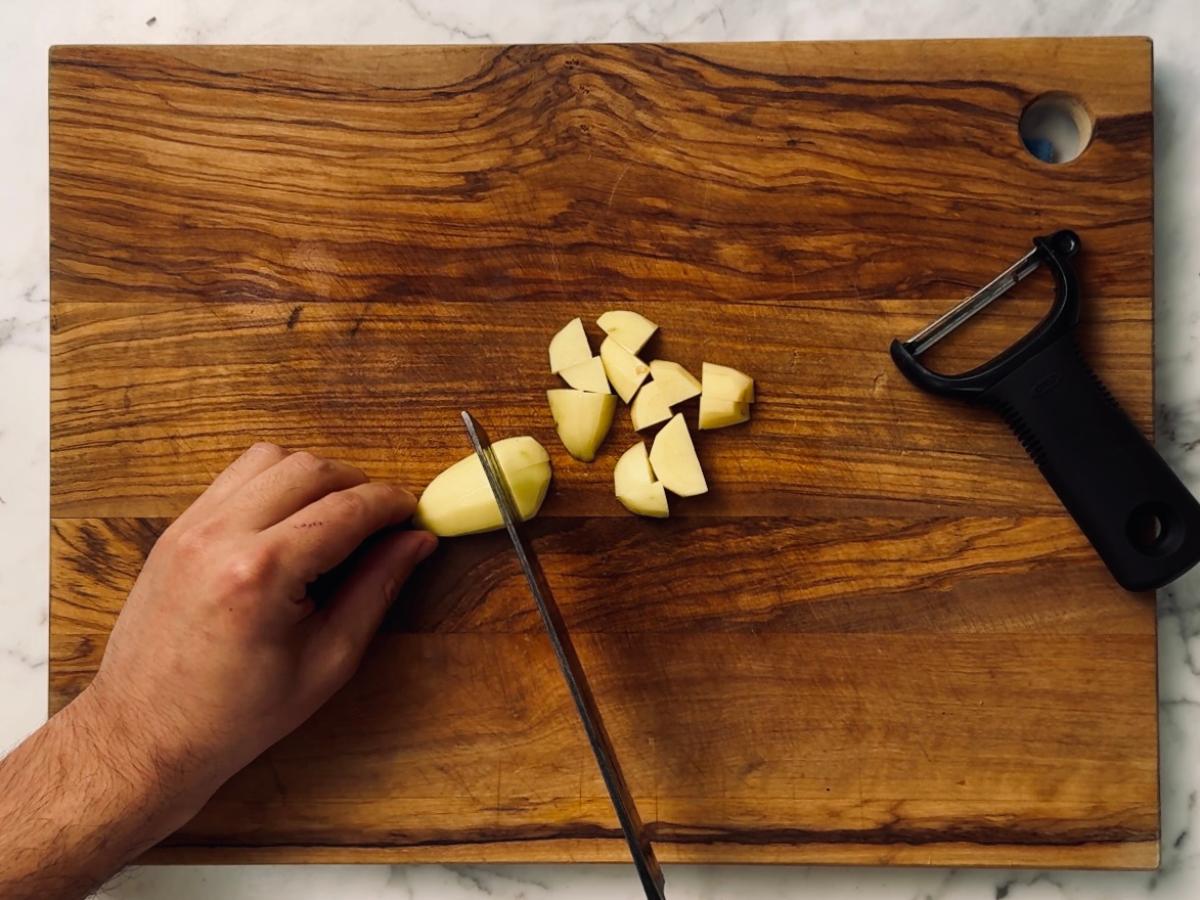
Start by preheating the oven and preparing the sweet potatoes. Peel them and slice lengthways into 1cm thick, oval pieces about the size of your palm. Arrange the slices in a single layer on a tray, drizzle with oil and roast until tender. Flip them halfway through so they cook evenly and check for doneness by piercing with a fork. They should be soft but still hold their shape.

Once the sweet potato slices are cooked, transfer them to a plate lined with kitchen paper and let them cool completely. This helps any excess oil drain away and makes it easier for the panko to stick later. Cooling the slices first also helps the crust stay light and crisp when fried.

2. Prep the Vegetables
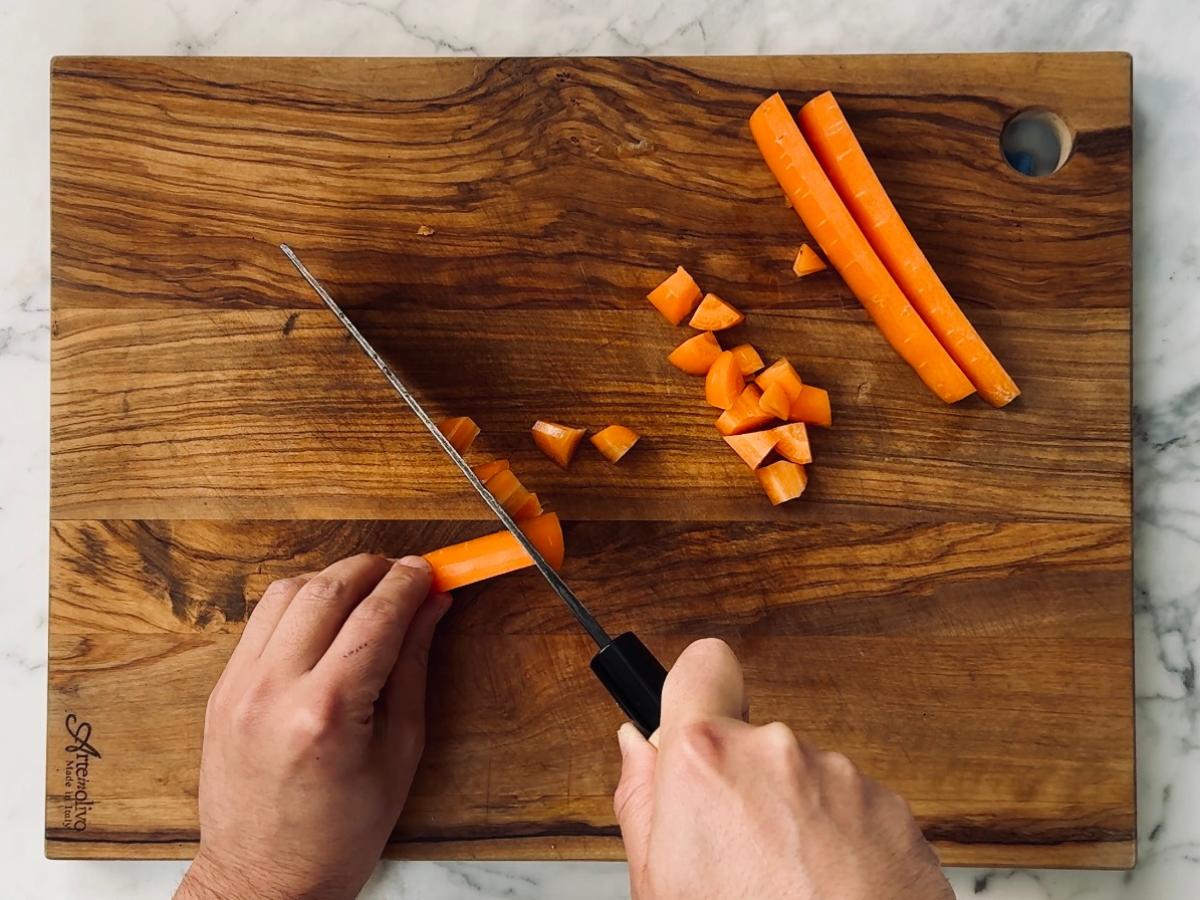
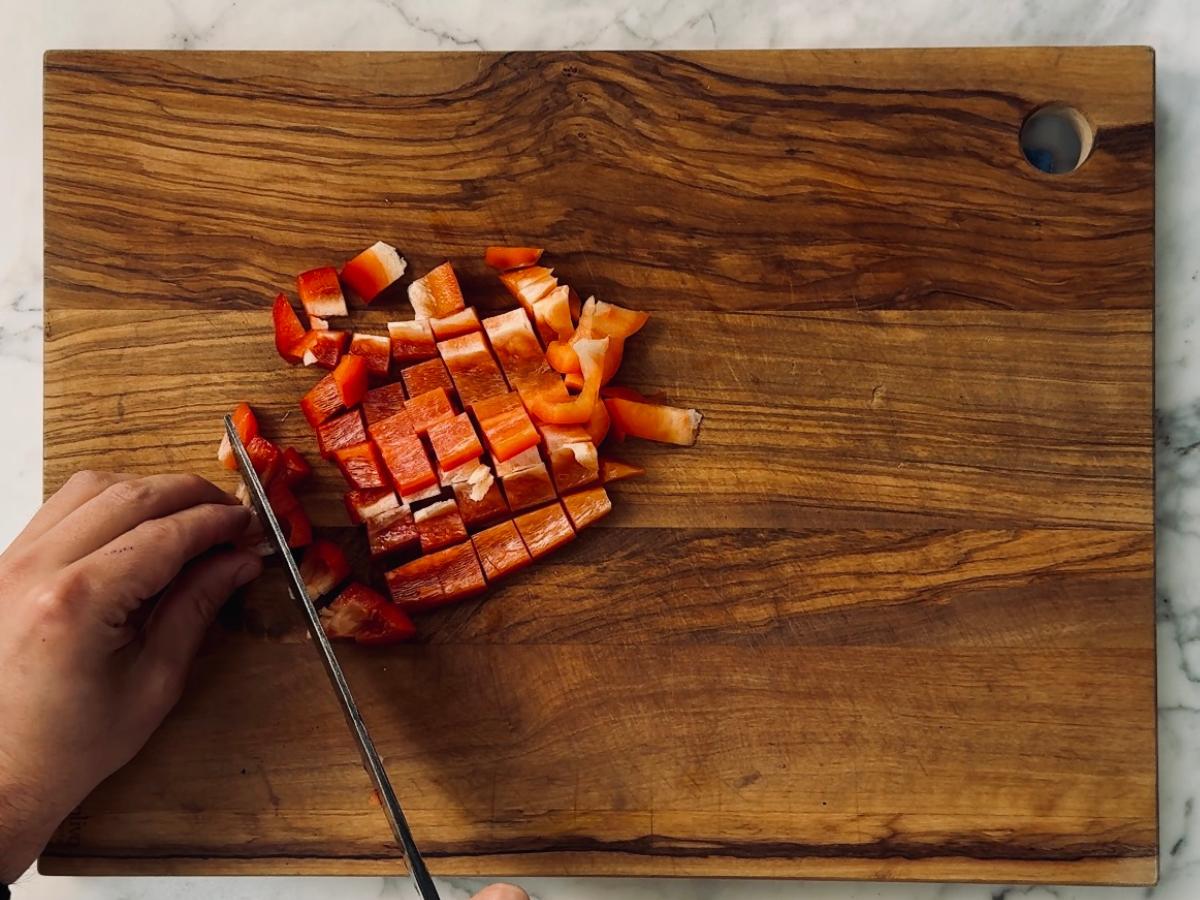
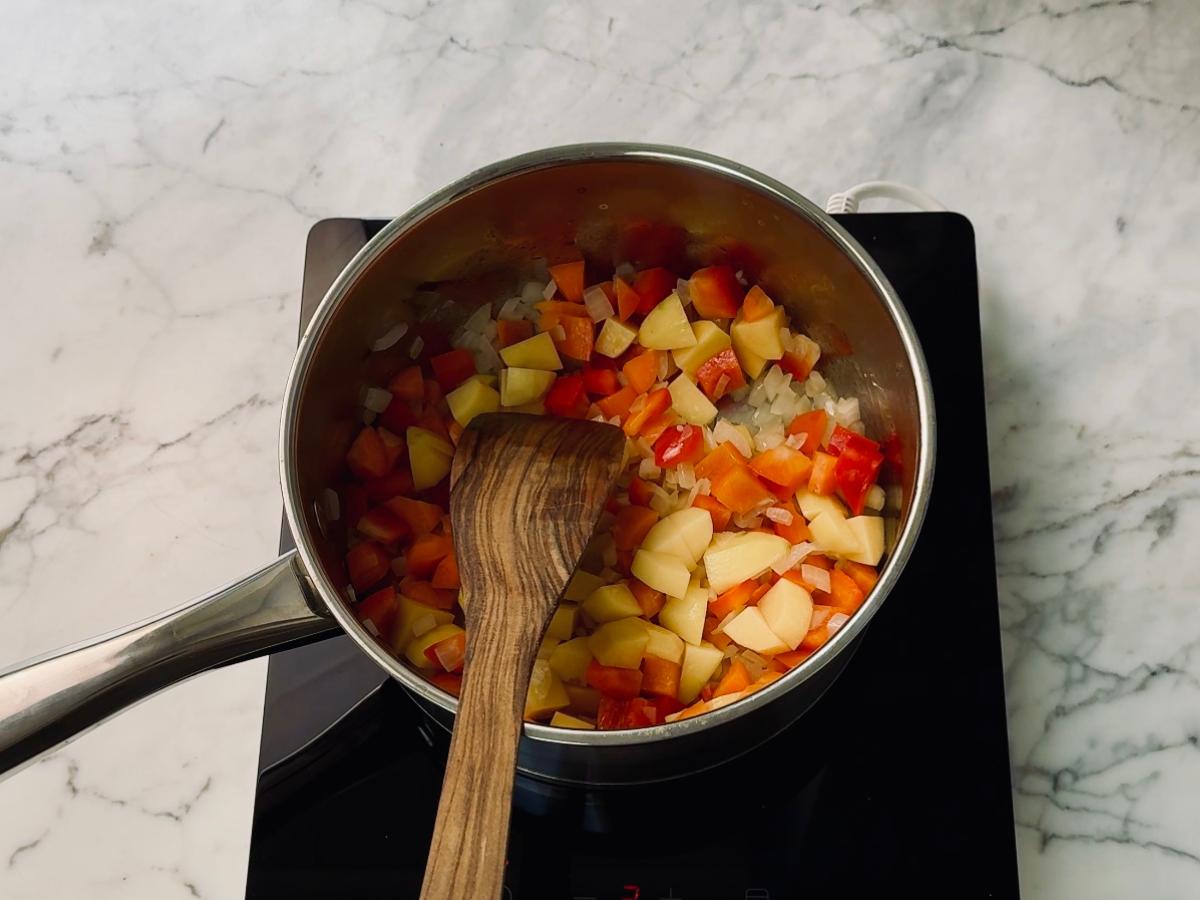
While the sweet potatoes roast, prepare the vegetables for your vegan Japanese curry. Peel the potatoes and carrots, then chop them along with the onion and pepper into small, even pieces so they cook evenly and blend nicely into the sauce.

Slice the garlic thinly so it softens and melts into the curry base.

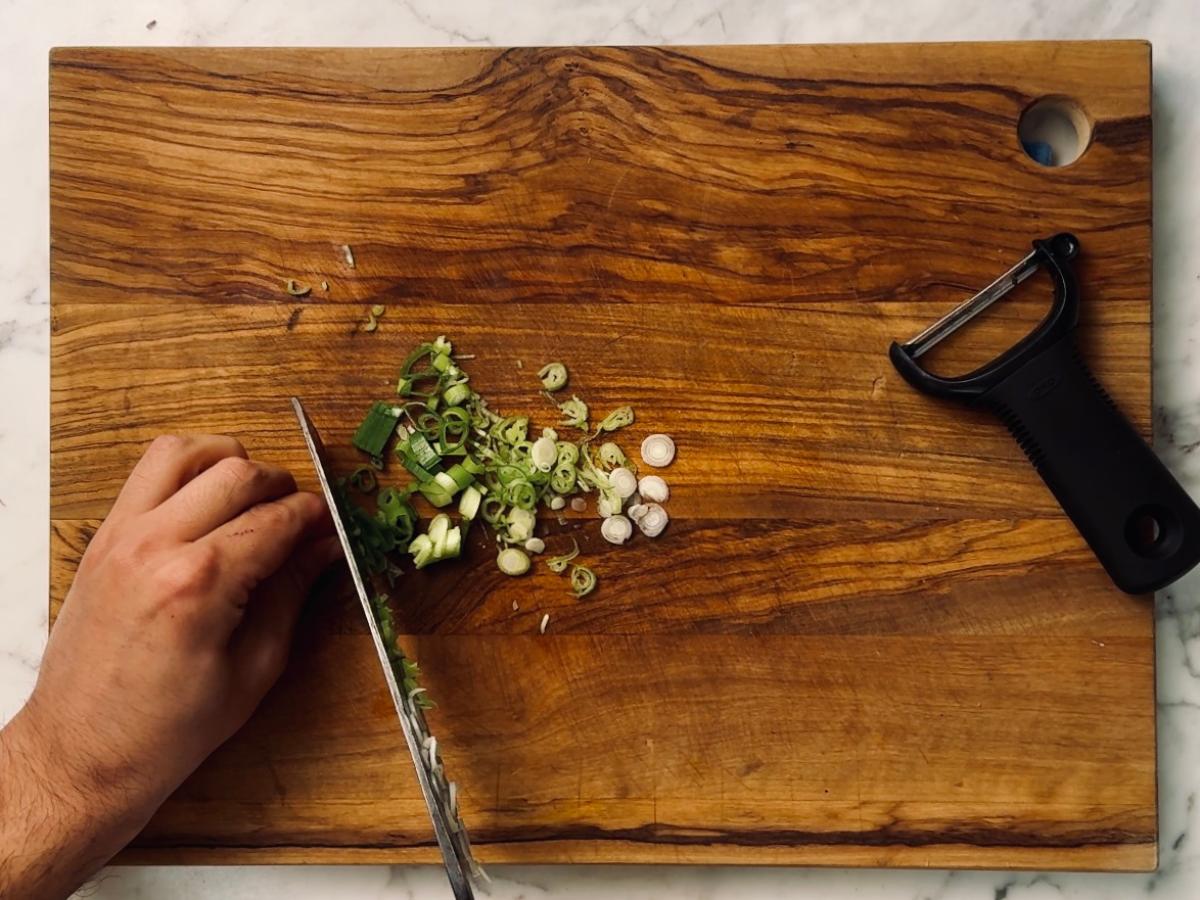
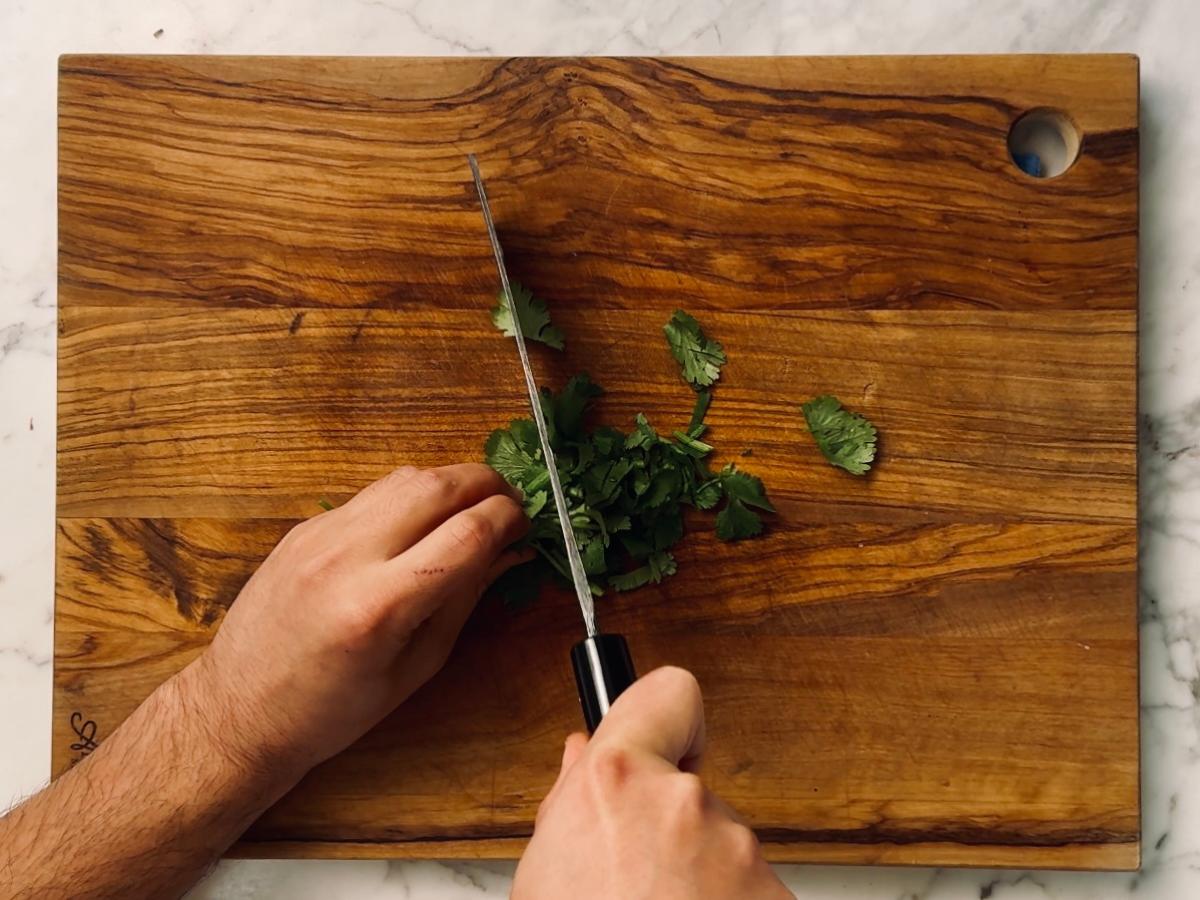
Finely slice the green onions and roughly chop a handful of cilantro leaves. These will be your finishing touches, adding a bright lift to balance the rich curry sauce. Set them aside until you're ready to serve.
3. Make the Curry Sauce
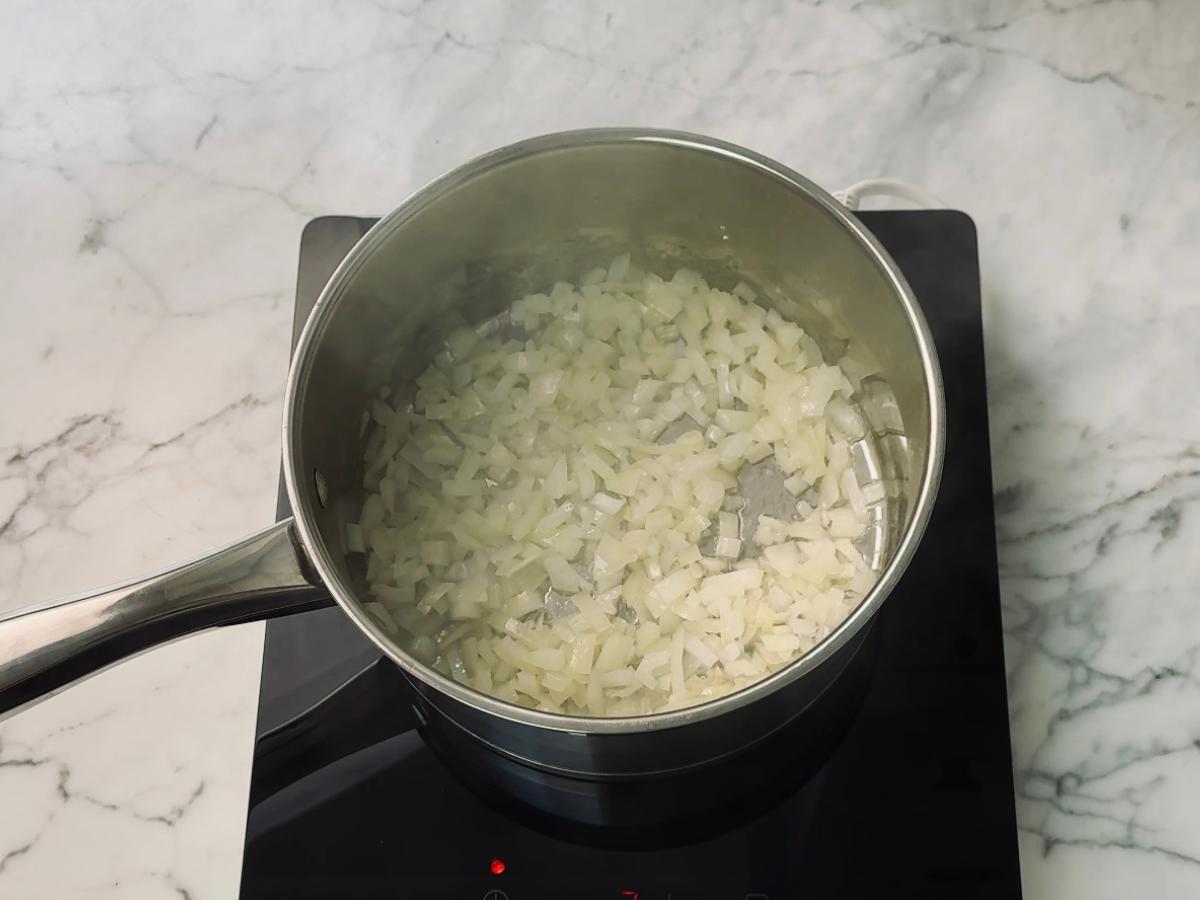
Warm a little oil in a large saucepan over medium heat, and cook the onion with a pinch of salt until it softens and just starts to turn golden brown. Add the garlic, carrot, pepper and potato, along with another small pinch of salt and a splash of soy sauce. Give everything a good stir and sauté for 3-4 minutes so the flavours start to come together.
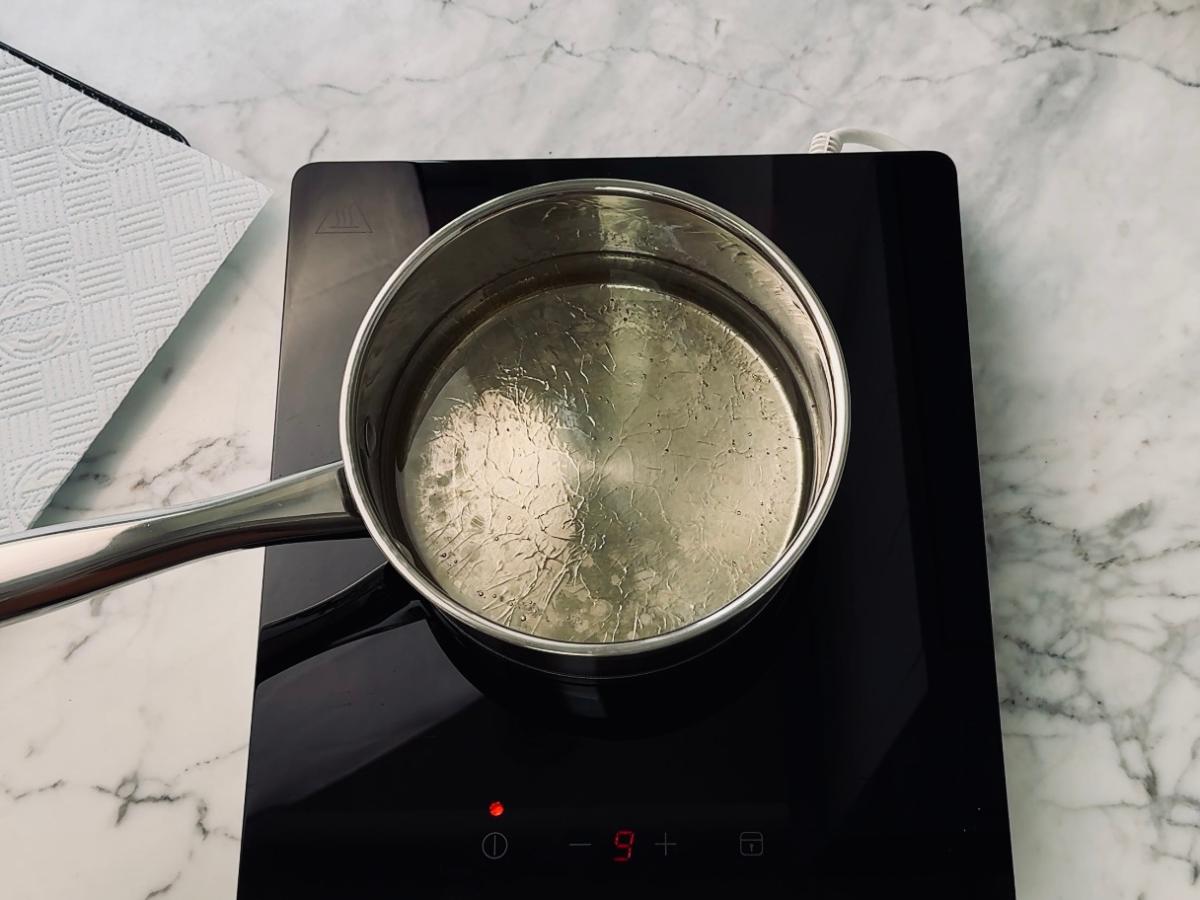
Then pour in your water, just enough to cover the vegetables, and bring it all to a gentle simmer. Let it bubble away for about 15-20 minutes, until the potatoes are fork-tender and the veggies are cooked through.
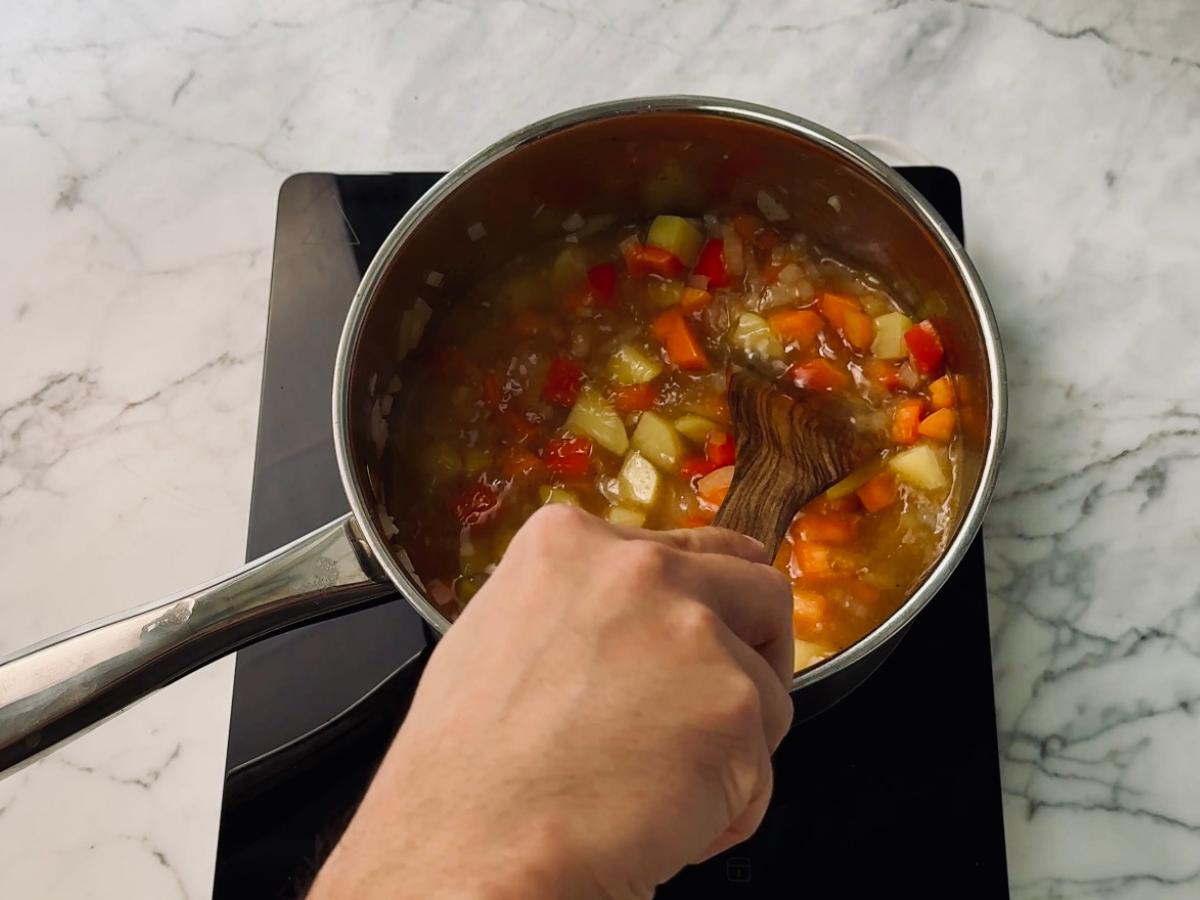
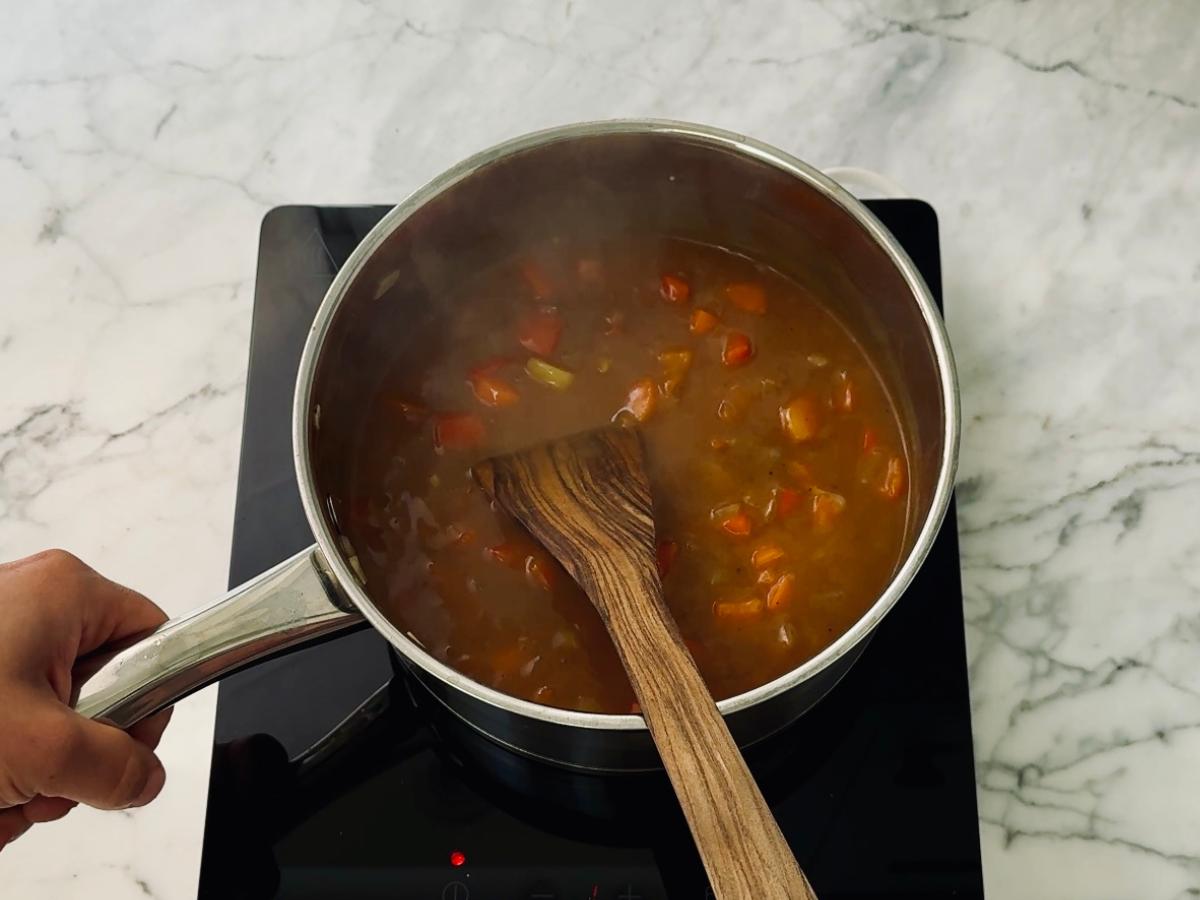
Once the veg are tender, stir in the S&B Golden Curry blocks as they melt into the sauce and begin to thicken. Keep stirring as it comes together. You're looking for a silky, glossy texture that lightly coats the back of a spoon. Reduce the heat to low and keep the curry warm on the lowest heat while you prepare the katsu.
4. Coat the Katsu
Now get your katsu breading station ready. You'll need three shallow bowls - one with plain flour, one with plant-based milk, and the last with panko breadcrumbs. Line them up in this order to make the dipping easy.

Dip each cooled slice of sweet potato in flour, then milk, and repeat both steps once more for a stronger coating. This double layer helps the panko stick and keeps the crust from slipping off during frying.
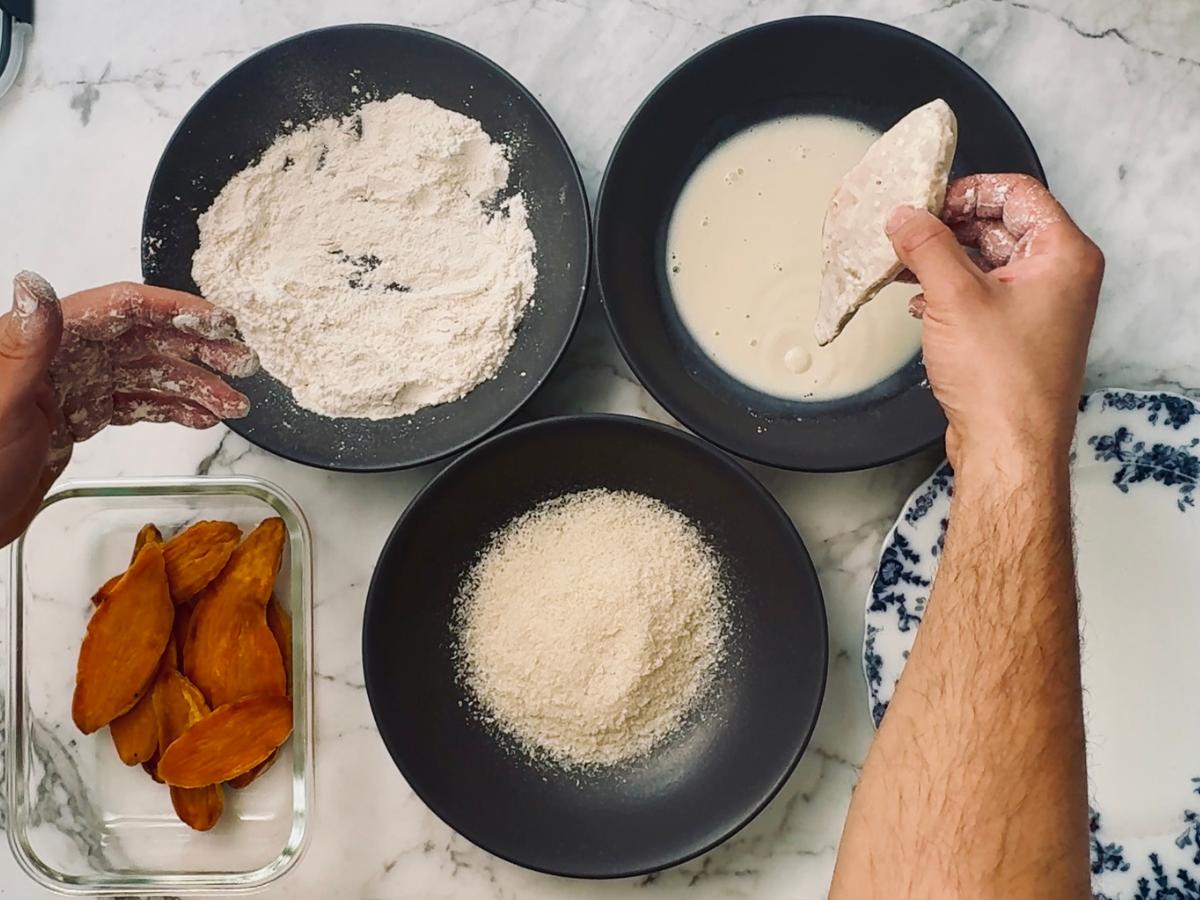
Press each slice into the panko so it's completely covered. Make sure each piece has a nice, even layer of panko as that's what gives you the light, crunchy texture when it hits the oil.

5. Fry Until Crispy
Heat a few centimetres of oil in a wide pan. To check it is ready, drop in a few panko crumbs; they should sizzle instantly and float to the surface. Fry the coated sweet potato slices in small batches for a few minutes on each side, giving them space so the oil stays hot and the crust turns evenly golden. Turn them gently to keep the coating intact, then transfer to a plate lined with kitchen paper to drain and rest before serving.

6. Serve and Enjoy
Before serving, make sure your Japanese rice is cooked and ready to go. Use a rice cooker if you have one and, if you don't, follow my guide on how to cook japanese rice without a rice cooker. When everything's ready, add a generous scoop of steamed rice to each plate and spoon the warm curry sauce over the top, letting it pool around the rice.

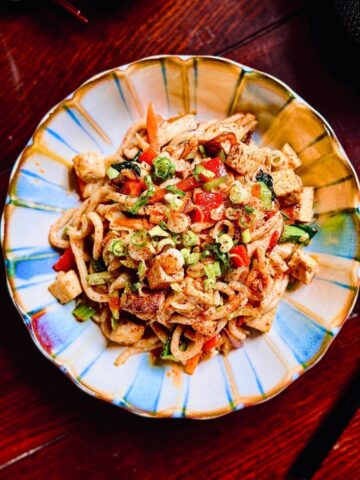
Lay the crispy sweet potato katsu pieces on top and finish with a sprinkle of sliced spring onions and cilantro. The result is everything you want in a vegan Japanese curry. Comforting, balanced and full of texture, it pairs perfectly with a cold Japanese beer.

Tips for Perfect Sweet Potato Katsu Curry
- Wait until your vegetables are fully cooked before adding the curry roux. If you add it too early or while the pot is too hot, it can stick to the bottom and burn, which affects both the flavour and texture of your curry. Stir continuously once added to help it dissolve evenly.
- Let the sweet potato cool before coating. If the slices are still warm when you coat them, the steam can loosen the crust. Cooling them completely helps the panko stick firmly and gives you that delicate, crisp finish when fried.
- Fry in small batches. Shallow fry the sweet potato in small batches to keep the oil temperature consistent. If you crowd the pan with too many pieces, the oil cools down and your katsu can turn soggy instead of crispy.
- Rest the katsu before serving. Once fried, let the katsu rest for a minute or two on kitchen paper. This helps any residual steam escape so the crust stays crisp when you pour the curry sauce over it.
If you love katsu dishes, try my eggplant katsu curry or tofu katsu burger next.
Substitutions
- Sweet potato: Roasted eggplant, tofu, or pumpkin all work well if you prefer any of these to sweet potato.
- Panko: Use gluten-free breadcrumbs for a GF version, or make your own from toasted bread.
- Curry roux: Any Japanese curry roux will work (there are several good brands on the market) if you can't get hold of S&B Golden Curry.
Variations
- Spicy: Add a pinch of chili flakes or a little finely chopped fresh chili to the curry sauce, then finish with a drizzle of La-yu (Japanese chili oil) when serving. Use one or all three if you like it extra hot.
- More veg: Make this a heartier vegetable katsu curry by adding green beans, courgette, spinach, or mushrooms to the sauce.
- Lighter option: For a lower-fat version, cook the sweet potato katsu in an air fryer instead of deep frying. It still crisps up beautifully while keeping the curry light.
Storage
For the best results, store the curry sauce and sweet potato katsu separately so the coating stays crisp.
Curry: The sauce keeps well in the fridge for up to three days and often tastes even better the next day. Reheat gently on the stove or in the microwave until piping hot, stirring now and then so it warms evenly.
Sweet potato katsu: These are best fresh, but leftovers can be kept in the fridge for up to two days. To bring back the crunch, reheat them in a hot oven rather than the microwave.
Sweet Potato Katsu Curry FAQs
Yes, definitely. You can turn this into a vegetable katsu curry by using tofu, pumpkin, or aubergine instead of sweet potato. The method stays the same: Roast, coat in panko, and fry until crisp before adding to the curry sauce.
We use S&B Golden Curry because it gives a classic flavour and silky texture. It's easy to find and melts smoothly into the sauce, making it a great base for any Japanese curry recipe.
Yes. If you prefer a homemade option, you can make your own roux by cooking flour, oil, and curry powder together, then adding vegetable stock. It will be lighter than the classic S&B version but still full of flavour.
Great plant-based substitutes include sweet potato, tofu, aubergine (eggplant), or seitan. Sweet potato is especially popular for its creamy texture and slight sweetness, which pairs beautifully with the savory curry sauce and crispy coating in a katsu curry.
Cool the roasted sweet potato completely before coating it, then fry in small batches so the oil stays hot. This keeps the panko crust light and crunchy without absorbing too much oil.
Serve it with Japanese rice, vegan miso soup, or simple sides like edamame, kinpira gobo, or pickled ginger. These balance the rich curry sauce and round out the meal.
In Japanese cooking, sweet potatoes are often roasted, simmered in soy-based broths, or used in tempura. For katsu-style dishes, they're sliced, coated in panko breadcrumbs, and shallow- or deep-fried until golden and crispy. Roasting before breading helps bring out their natural sweetness and gives them a soft, fluffy centre.
Other Popular Recipes
- Vegan Miso Ramen - Quick 10 Minute Recipe
- Yuzu Ramen (Japanese Citrus Noodle Soup Recipe)
- Mabo Nasu (Mapo Eggplant 麻婆茄子)
- Our Favourite Vegan Udon Noodle Recipes
📖 Recipe

Vegan Sweet Potato Katsu Curry (with Golden Curry Sauce)
Ingredients
Rice
- 2 cups Japanese short grain rice
- 2.2 cups Water
For the curry
- 92 g S&B curry block, or equivalent
- 750 ml water
- 1 medium onion
- 1 medium carrot
- 5 baby potatoes, or 2 white potatoes
- ½ red bell pepper
- 2 tablespoon neutral oil (1 for roasting and 1 for stir-frying)
For the katsu
- 5-6 medium sweet potatoes (about 150g per person)
- 50 g panko breadcrumbs
- 60 g plain flour
- 200 ml oat milk
- 300 ml neutral oil, for deep frying
For serving
- 2 green onions (spring onions), thinly sliced
- small bunch of cilantro (coriander), optional
Instructions cook mode
- Start cooking your Japanese rice first so it's ready when the curry is done. Rinse and drain the rice 2-3 times until the water runs clear, then cook in a rice cooker using a 1:1.2 rice-to-water ratio. If using the stovetop, follow these instructions.
- Roast the sweet potatoes: Preheat the oven to 180°C (360°F) fan. Wash, peel, and slice the sweet potatoes lengthways into 1 cm thick ovals. Arrange on a tray, drizzle with oil, and roast for 20 minutes, turning halfway. They should be soft but hold their shape. Transfer to kitchen paper to cool completely.
- Prepare the vegetables: Peel and chop the onion, carrot, and potatoes into small, even cubes. Slice the red pepper into 1-inch squares and the garlic thinly. Finely slice the spring onions and roughly chop the cilantro for garnish; set aside.
- Cook the curry sauce: Heat 1 tablespoon of oil in a saucepan over medium heat. Add the onion and a pinch of salt and cook until soft and lightly golden. Add the garlic, carrot, pepper, and potatoes along with another pinch of salt and a splash of soy sauce. Stir for 3-4 minutes. Add enough water to cover and simmer for 15-20 minutes until the vegetables are tender. Stir in the S&B Golden Curry blocks until melted and the sauce thickens. Keep warm on low heat.
- Coat the katsu: Set up three shallow bowls with flour, oat milk, and panko breadcrumbs. Dip each cooled sweet potato slice in flour, then milk, then repeat both steps once more. Press into panko until fully coated with an even layer.
- Fry the katsu: Heat about 3 cm of oil in a wide pan to 180°C (360°F) (check with a crumb of panko, it should sizzle and float). Fry the coated slices in small batches for 2-3 minutes per side until golden and crisp. Drain on kitchen paper.
- Assemble and serve: Spoon the curry sauce over bowls of steamed Japanese rice. Lay the crispy sweet potato katsu pieces on top and finish with sliced spring onions and cilantro. Serve immediately.
Notes
- Let the roasted sweet potato cool before coating so the panko sticks properly.
- Use hot oil when frying to keep the coating light and crispy, not greasy.
- Slice evenly for consistent texture, thicker = softer, thinner = crispier.
- Press the panko firmly onto each piece for an even crust.
- Fry in batches to avoid overcrowding and maintain oil temperature.
- The curry thickens as it cools, add a splash of water when reheating.
- Serve immediately for the best crispy texture.


Leave a Reply