
Perfect sushi rice is at the heart of so many Japanese dishes and - good news - it's easier to get right than you might think. In this sushi rice recipe, I'll show you how to make it with or without a rice cooker. A rice cooker is great for ease and consistency, but knowing how to make sushi rice on the stovetop is a really handy skill - especially if you love Japanese food. It's one you'll definitely find yourself using again and again.

Sushi Rice – At a Glance
Ask AI about this recipe
Summaries, substitutions, scaling, allergen checks — or save this site to your AI for future recipe ideas.
AI answers can be wrong. Treat them as suggestions, not as a substitute for the recipe above.
This method keeps things simple and helps you get that perfect sushi rice texture - sticky but not mushy, with just the right balance of seasoning.
Whether you're making a classic avocado maki or something a bit more adventurous (like vegan eel 🍆), this is a recipe worth bookmarking or printing out and keeping in your back pocket. Once you've mastered it, you'll have the foundation to explore countless Japanese dishes.
Jump to:
Ingredients
Serves: 2 | Prep time: 20 mins | Cooking time: 25 mins
For the rice:
- 1 cup or 200g Japanese short-grain rice
- 1 ⅛ cup of water
- 3"x5" piece of kombu (optional - adds umami flavor)
For the sushi seasoning:
- 3 tablespoons vinegar
- 1 ½ tablespoons sugar
- ½ teaspoon salt
How to Make Sushi Rice

1. Place the rice into your rice cooker bowl or saucepan and drench in cold water. Swirl the rice using your hand to release the excess starch.

2. Slowly drain the water, being careful not to lose any grains. Repeat this washing process 3-4 times until the water runs mostly clear.

3. Add 1 ⅛ cup of water to the rice, make sure all the grains are submerged in the water and level off the rice so there aren't any large peaks and troughs. Then gently lay a piece of kombu on top. Allow the rice to soak for at least 20 minutes.

4. Rice cooker method: Place the rice cooker bowl in the rice cooker, close the lid firmly and start the rice cooker.
Skip and go straight to step 5 if you're using a pan on stovetop.
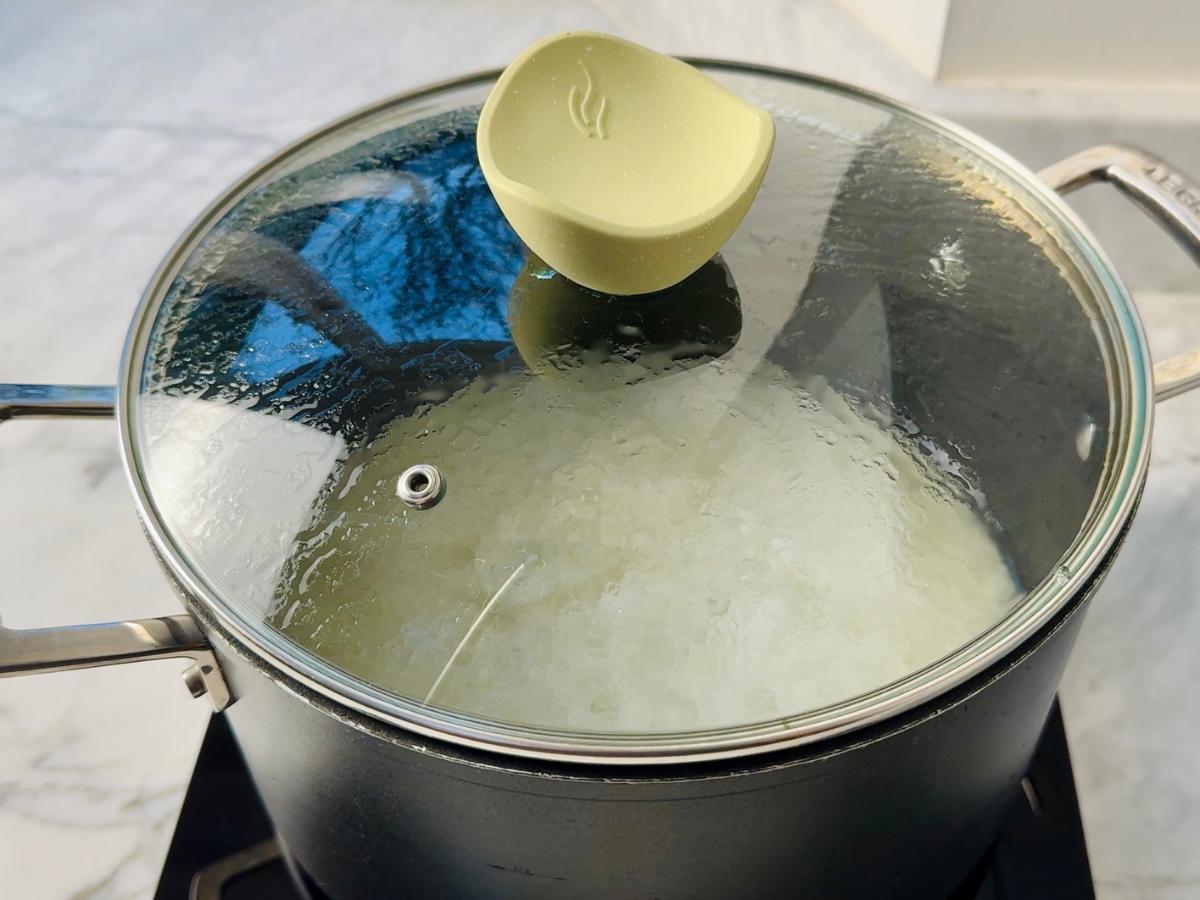
5. Pan and stove top method: Lid the pan and place on a high heat. As soon as the water begins to boil, reduce the heat to a low simmer for 15 minutes or until the water is completely absorbed. Turn off the heat and leave the rice to rest for 5 minutes.
Skip this step if using the rice cooker method.
Next prepare the sushi seasoning:

6. While the rice is cooking, combine the vinegar, sugar, and salt in a small pan. Heat gently, stirring until the sugar and salt are completely dissolved. Set aside.

7. Once cooked, transfer the rice to a large mixing bowl. A bamboo hangiri is traditional, but any mixing bowl us fine. Use a paddle to gently break apart the rice without crushing the grains.

8. Evenly pour the sushi seasoning over the rice.

9. Using a spatula, fold the seasoning into the rice with light motions. Avoid smashing or overmixing.

10. Once seasoned, allow the rice to cool to room temperature before using it to make vegan unagi sushi, onigiri, bento, or any other dish.
Hint: The rice really matters here. For that classic sticky, slightly chewy texture, you'll want to use short-grain Japanese rice, nothing else quite does the job. You can use white or brown but don't skip the seasoning.
If brown rice sushi is new to you, it can be so delicious and such a healthy alternative to white rice I truly recommend it. Some of the best brown rice sushi I've ever eaten was at a lovely small and very excellent Japanese restaurant in London called Uchi. I highly recommend you pay a visit there if you can.
Substitutions
Rice: I've already mentioned that using the right type of rice is crucial for making proper sushi rice, but if you cannot find Japanese short-grain rice, Calrose is a good alternative. Avoid using any other types of rice, as they don't have the same essential starchiness.
Vinegar: Rice vinegar is preferred, but if it's not available, white vinegar with a tiny pinch of sugar can be a substitute.
Kombu: Adding a chunky strip of kombu to your rice while cooking will add umami, but it's not essential. If you can't get hold of some kombu, just skip it.
Variations
- Brown sushi rice: For a healthier option, use brown short-grain rice and adjust the water ratio - add slightly more water as the brown grain variety needs to absorb more to get the right texture. Note that brown sushi rice tends to be slightly less sticky.
- Infused seasoning: Add a squeeze of yuzu (Japanese citrus) to the sushi seasoning for an aromatic citrus twist.
- Shiso sushi rice: Gently stir 1-2 teaspoons of dried shiso leaves through the cooked rice for added flavor and texture.
Equipment
You don't need anything fancy to make great sushi rice - just a basic pan and spatula will do the job. What really matters is following the right quantities, sticking to the method, and getting the timing right.
That said, if you'd rather not think about it too much, a rice cooker can definitely make things easier. I will try to find the one I use and share it, but it's old - any standard rice cooker is fine. Here are a few other bits I used in this sushi rice recipe:
- Mixing Bowl - I use a large bamboo hangiri for mixing and cooling the rice down but you can use any large mixing bowl.
- Spatula: Preferably a flat, wooden spatula to avoid breaking grains.
- Small Pan for preparing your sushi seasoning.
Storage
Store leftover sushi rice in an airtight container at room temperature if using within a few hours. For longer storage, refrigerate for up to 2 days and microwave briefly with a damp cloth to restore some fluffiness before serving. Sushi rice is best enjoyed fresh and luckily doesn't take too long to make.
Top Tip
Give the rice a good and thorough wash before you cook it. Removing the excess starch from the grain is crucial for a lovely fluffy, shiny rice at the end so don't rush this step.
Sushi Rice FAQs
To make sushi rice, you'll need short-grain Japanese rice, rice vinegar, sugar, salt, and water. Optionally, you can add a piece of kombu (dried kelp) while cooking the rice to enhance the flavor.
The secret is in the balance - perfectly cooked rice that's sticky but not mushy, and just the right mix of vinegar, sugar, and salt. Washing the rice thoroughly and seasoning it while warm are key steps.
Yes, rice vinegar is essential. It gives sushi rice its distinct flavor and helps create the right texture and stickiness. If you absolutely can't find it, you can use white vinegar in a pinch - but the flavor won't be quite the same.
It's all about technique. Use a good pot with a lid, follow the water-to-rice ratio carefully, and don't skip the soaking and resting steps. Season the rice while it's still warm and mix gently to avoid breaking the grains.
Technically yes, but the texture won't be quite right. Regular long-grain rice is too dry and doesn't stick well. Short-grain Japanese rice is ideal for sushi because it's naturally sticky and holds its shape when rolled.
Related
Looking for other tasty vegan Japanese recipes? Why not try these:
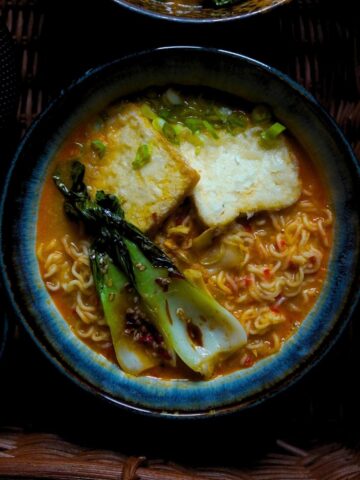
- Vegan Miso Ramen - Quick 10 Minute Recipe
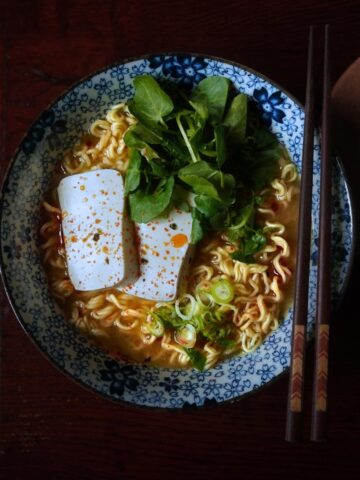
- Yuzu Ramen (Japanese Citrus Noodle Soup Recipe)
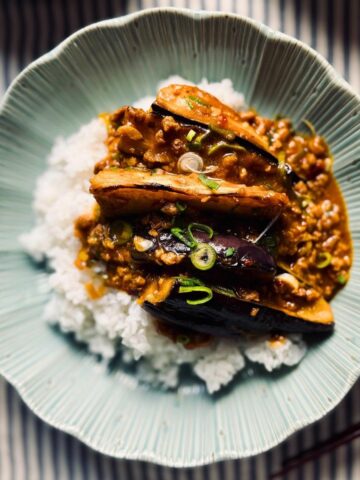
- Mabo Nasu (Mapo Eggplant 麻婆茄子)
- Our Favourite Vegan Udon Noodle Recipes

Pairing
These are my favorite dishes to serve with sushi rice:
- Eggplant Agebitashi (Nasu Agebitashi)
- Vegan Fried Chicken
- Beer and Eggplant Stir-Fry (10 Minute Recipe)
- Sticky Tofu: 10-Minute Recipe

📖 Recipe

Sushi Rice, with or without a rice cooker
Equipment
- 1 Rice cooker Optional - this recipe will cover method with or without
- 1 saucepan If you're not using a rice cooker you'll need to use a saucepan on stove top
- 1 Large mixing bowl I use a large bamboo hangiri for mixing and cooling the rice down but you can use any large mixing bowl
- 1 Spatula Preferably a flat, wooden spatula to avoid breaking grains.
- 1 Small pan For preparing your sushi seasoning.
Ingredients
For the rice:
- 1 cup Japanese short-grain rice
- 1 ⅛ cup of water
- 1 2"x5" piece of kombu optional, adds umami flavor
For the sushi seasoning:
- 3 tablespoons vinegar
- 1 ½ tablespoons sugar
- ½ teaspoon salt
Instructions cook mode
Rinse, repeat and soak:
- Place the rice into your rice cooker bowl or saucepan and drench in cold water. Swirl the rice using your hand to release the excess starch.
- Slowly drain the water, being careful not to lose any grains. Repeat this washing process 3 times until the water runs mostly clear.
- Add your cooking water to the rice, make sure all the grains are submerged in the water. Swirl gently to level off the rice so there aren't any large peaks and troughs. Then gently lay a piece of kombu on top. Allow the rice to soak for at least 10 minutes.
Rice cooker method:
- If using a rice cooker, place the rice cooker bowl in the rice cooker (with the rice and water in), close the lid firmly and start the rice cooker.
Stove top:
- If using a stovetop, lid the pan and place on a high heat. As soon as the water begins to boil, reduce the heat to a low simmer for 15 minutes or until the water is completely absorbed (until there's no more steam). Turn off the heat and leave the rice to rest for 5 minutes.
Sushi Seasoning:
- While the rice is cooking, combine the vinegar, sugar, and salt in a small pan. Heat gently, stirring until the sugar and salt are completely dissolved. Set aside.
- Once cooked, transfer the rice to a large mixing bowl. A bamboo hangiri is traditional, but any mixing bowl us fine. Use a paddle to gently break apart the rice without crushing the grains. Use a gently chopping motion with the side of your paddle.
Mix it up:
- Evenly pour the sushi seasoning over the rice and using a spatula, fold the seasoning into the rice with light motions. Avoid smashing the rice. Once weverything has fully combined, allow the rice to cool to room temperature before using it to make sushi, bento, or any other dish.
Notes
Mix in the sushi vinegar while the rice is still warm so it absorbs evenly. Fold, don’t stir
Use a slicing and folding motion to mix the rice. Stirring too aggressively will break the grains and make the rice mushy. Let it cool slightly before using
Sushi rice should be slightly warm or room temperature when used, not hot or cold. Cover to prevent drying out
Keep the rice covered with a damp cloth if not using immediately to stop it from drying out. Use a wide bowl if possible
A wide bowl helps the rice cool faster and makes it easier to mix evenly.


Leave a Reply