
Crispy on the outside, soft and savory on the inside - this vegan yaki onigiri recipe transforms simple rice balls into a crave-worthy, pan-grilled snack or light meal. All you need is short-grain rice, a quick soy-based marinade, and a hot pan. Serve them hot and golden, or pack them cold for a grab-and-go bite.

Yaki Onigiri – At a Glance
Ask AI about this recipe
Summaries, substitutions, scaling, allergen checks — or save this site to your AI for future recipe ideas.
AI answers can be wrong. Treat them as suggestions, not as a substitute for the recipe above.
Yaki onigiri, or grilled rice balls, is a classic Japanese comfort food known for its crispy crust and smoky, umami-rich flavor. It's a simple, satisfying dish you can enjoy on its own or as part of a bigger meal with vegan miso soup, gyoza, and pickles. Whether you're making lunchboxes, meal prepping, or just want something salty and crunchy, these rice balls hit the spot.
What Is Yaki Onigiri?
At its core, yaki onigiri is grilled onigiri - rice balls that are shaped, brushed with a savory glaze, and cooked until golden and crispy. It's a popular street food and izakaya snack in Japan, and it's easy to make vegan with pantry staples like soy sauce, mirin, and sesame oil.
Unlike regular onigiri, which are often filled and left plain, yaki onigiri are all about the crispy texture and caramelized outer layer. They're quick to make, endlessly adaptable, and perfect hot or cold.

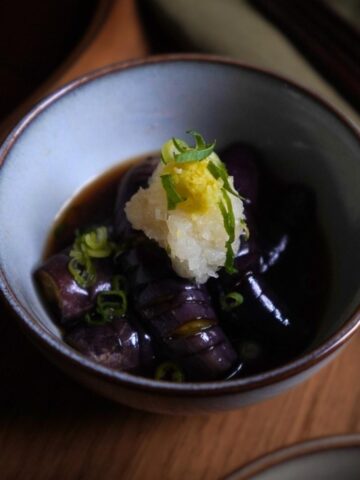
These are are great lunch box filler, great for picnics and as part of a larger meal. Pair with easy vegan miso soup, uramaki sushi or eggplant nigiri.
Why You'll Love This Vegan Yaki Onigiri
- 100% Vegan: No animal products - just rice, sauce, and sizzle.
- Minimal Ingredients: You probably have everything on hand.
- Portable & Versatile: Serve them fresh, pack them for lunch, or stash a batch in the fridge.
Jump to:
Ingredients
Serves 2 | Makes 4 Onigiri | Prep Time: 5 mins| Cook Time: 15 mins
- Cooked short-grain Japanese rice
- Sesame oil
For the marinade:
- Soy sauce (Kikkoman or similar)
- Mirin
- Sake
- Sugar
- Kombu Dashi powder (optional for extra umami)
How to Make Yaki Onigiri
Before you begin make sure you have cooked japanese rice to hand. Follow this recipe for instructions on how to cook perfect japanese rice without a rice cooker.

- If you're working with freshly cooked rice, transfer it to a mixing bowl. Use a rice spatula to fluff the rice with a gentle chopping motion. Let it cool completely before shaping - this helps the rice hold its form.

- To prepare the marinade, add all marinade ingredients to a small saucepan. Warm over low heat until the sugar fully dissolves, then remove from heat and set aside to cool.
Using a rice mould:

- Place a sheet of baking paper on your work surface. Grab your onigiri mould and fill it with approximately 120g of rice.

- Press the rice down firmly using the mould press. Once compacted, lift the sides of the mould to release the shaped onigiri.

- Your rice ball should be about 3 cm thick and neatly formed - ready for grilling.
Shaping Onigiri by Hand:

- Lightly wet your hands with water to prevent sticking. Scoop out around 120g of rice.

- Cup your dominant hand to form the tip of the triangle, while using the palm of your other hand to press and shape the edges.

- Continue gently rotating and pressing the rice until you form a firm, evenly shaped triangle.
Cooking the Yaki-Onigiri

- Heat sesame oil in a non-stick frying pan over medium heat. Place your shaped onigiri into the pan.

- Using a pastry brush, coat the top-facing side of each onigiri with half the marinade. Let it sizzle for about a minute.

- Flip the onigiri, then brush the other side with the remaining marinade, ensuring full coverage.

- Continue cooking for another 1-2 minutes, or until both sides are golden, charred and crispy. Enjoy!
Hint: When shaping by hand, keep a bowl of water nearby to prevent rice sticking to your hand.
Substitutions
1. No sesame oil?
No problem. You can swap sesame oil with any neutral oil that has a high smoke point, such as avocado oil, grapeseed oil, or sunflower oil. While you'll miss that signature nutty aroma, the crisp texture will still come through. For a hint of sesame flavor, consider adding a few drops of toasted sesame oil after cooking.
2. No mirin or sake?
If you don't have mirin or sake on hand, you can substitute both with rice vinegar and a touch of sweetener like maple syrup or sugar. Use 1 tablespoon of rice vinegar mixed with 1 teaspoon of sweetener for each tablespoon of mirin or sake. Keep in mind this will slightly alter the depth of the marinade, but it still works beautifully.
3. Gluten-free?
To make this recipe gluten-free, swap out soy sauce for tamari or a gluten-free soy alternative like coconut aminos. Double-check the labels on your dashi powder (if using) to ensure it's gluten-free as well. The flavor will still be rich and umami-packed.
Variations
1. Spicy Miso Glaze
Brush your onigiri with a mixture of miso paste, maple syrup, and chili flakes before grilling. It adds a sweet-salty heat and a bold umami kick that caramelizes beautifully in the pan. (Perfect for: Fans of Korean or spicy Japanese flavor)
2. Furikake
Before grilling, coat the rice balls in vegan furikake or sesame seed mix. The added crunch and flavor make this version visually stunning and packed with texture.
3. Stuffed Kimchi Onigiri
Add a teaspoon of chopped, well-drained vegan kimchi to the center of the rice ball before shaping. The fermentation adds tang and depth, balancing the smoky grilled exterior. (Mix in a little vegan mayo for extra richness)
Equipment
- Rice cooker (optional, but helpful for perfect rice texture)
- Onigiri mold (or your hands for shaping)
- Non-stick frying pan or skillet
- Pastry brush
- Mixing bowl
- Rice paddle or spoon
- Saucepan (for marinade)
- Baking paper or clean surface for shaping
Storage
- Store: In an airtight container for up to 2 days.
- Reheat: In a frying pan to restore the crispy crust.
- Cool Rice Fast: Spread it out to avoid bacterial growth.
- Reheat Thoroughly: Heat to 165°F (74°C) before serving leftovers.
Tips for Success
- Use Sticky Rice: Japanese sushi rice holds its shape best and provides the perfect texture.
- Firm But Gentle: Press the rice enough to hold, but not so hard it becomes dense.
- Control the Heat: Medium heat crisps without burning the glaze.
Yaki Onigiri FAQs
Yes - yaki onigiri are great for meal prep. You can grill them in advance and store them in an airtight container in the fridge for up to 2 days. When you're ready to eat, reheat them in a dry pan over medium heat until the exterior crisps up again. You can also enjoy them cold straight from the fridge, especially as part of a bento box or lunch spread.
Pro tip: If you're reheating, cover the pan with a lid for the first minute to warm the inside evenly before crisping the surface.
You can, but it's a bit trickier. Brown rice doesn't have as much natural stickiness as white short-grain rice, which makes it more prone to falling apart. If you want to try it, opt for short-grain brown rice and cook it with slightly less water to help it hold together better. You can also stir in a teaspoon of potato starch or rice flour while it's still warm to help with binding.
Alternative: Consider using a mix of white and brown rice for the best of both worlds - flavor and texture.
Definitely! If you're avoiding oil, use a non-stick pan or grill pan and skip the sesame oil. You can still achieve a crisp exterior by dry-grilling the onigiri over medium heat - just be sure to monitor the temperature so they don't stick or burn. A silicone pastry brush also helps to distribute the marinade evenly without excess liquid.
Bonus idea: Finish with a sprinkle of toasted sesame seeds to replicate the nutty flavor of sesame oil.
Short-grain Japanese rice (sometimes labeled sushi rice) is the gold standard for onigiri. It's sticky enough to hold its shape, but still tender and fluffy. Avoid long-grain rice or jasmine rice, as they're too dry and won't hold together. If you're not sure, check the package for terms like short-grain, sushi rice, or mochi rice.
Related
Looking for other recipes like Yaki Onigiri? Try these:

Pairing
Find more great dishes to serve with your Yaki Onigiri:

📖 Recipe

Yaki Onigiri (Vegan Grilled Rice Balls)
Equipment
- Rice cooker (optional, but helpful for perfect rice texture)
- Onigiri mold (or your hands for shaping)
- Non-stick frying pan or skillet
- Pastry brush
- Mixing bowl
- Rice paddle or spoon
- Saucepan (for marinade)
- Baking paper or clean surface for shaping
Ingredients
For the rice:
- 550 g cooked Japanese short-grain rice
- 1 tablespoon sesame oil or neutral oil
For the marinade:
- 2 tablespoon soy sauce or tamari for gluten-free
- 1 tablespoon mirin
- 1 teaspoon sake
- 1 teaspoon sugar
- 1 teaspoon dashi powder optional, for extra umami
Instructions cook mode
How to Make Vegan Yaki Onigiri
- If you're using freshly cooked rice, transfer it to a mixing bowl and fluff it with a chopping motion using a rice spatula. Let the rice cool completely before shaping.
- Prepare the marinade by adding the soy sauce, mirin, sake, sugar, and dashi powder (if using) to a small saucepan. Warm over low heat until the sugar dissolves, then remove from heat and set aside.
Using a Rice Mould
- Place a sheet of baking paper on your work surface and grab your onigiri mould. Fill the mould with approximately 120g of rice.
- Press the rice down firmly using the mould's press insert, then lift the sides of the mould to reveal the shaped onigiri.
- The onigiri should be about 3 cm thick and neatly formed, ready for grilling.
Shaping by Hand
- Lightly wet your hands with water to prevent sticking, then scoop out around 120g of rice.
- Gently form the rice into a triangle shape by cupping your dominant hand to shape the tip, while your other hand presses and forms the edges.
- Keep rotating and pressing gently but firmly until you form an even triangle.
Cooking the Onigiri (Yaki-Onigiri)
- Heat sesame oil in a non-stick frying pan over medium heat. Place the shaped onigiri into the pan.
- Use a pastry brush to coat the visible side of each onigiri with half the marinade. Let it cook for about 1 minute, allowing the base to brown and crisp.
- Flip each onigiri, then brush the other side with the remaining marinade.
- Cook for another 1-2 minutes, or until both sides are golden brown and crispy. Remove from heat and serve hot or cold.
Notes
Rice that is too cold won't hold together well. Slightly warm rice is easier to shape and grill. Shape firmly but don’t over-compress
Press the rice just enough to hold its shape. Overly compact onigiri can become dense instead of light inside. Get a good crust before flipping
Let the onigiri cook undisturbed until a golden crust forms. This helps prevent sticking and gives the signature crispy texture. Use medium heat
Too high and the outside burns before the inside warms through. Medium heat gives you an even, crispy finish. Oil the pan lightly
A small amount of oil helps create a golden crust and prevents sticking. Serve immediately
Yaki onigiri is best enjoyed hot, when the outside is crisp and the inside is soft.


Leave a Reply